Saturday, March 30, 2013

Homemade Easter Basket Treats

This year I wanted to go a little above and beyond the normal store-bought candy for the kids' baskets.  Not far beyond, mind you.  I like simple.

So while I was searching the internet I came across this cute idea but I decided to modify it since I didn't have the "puffs" to work with.

I used those mongo pillow-sized marshmallows for the body of the bunny. I cut them in half with kitchen scissors.  Then I cut the other half of the mallow into 4 equal pieces to use for heads.  Everything else was pretty much the same.

I would note that you sure don't need a whole cup of powdered sugar to put these together.  Feel free to cut that in thirds, or even fourths, or LESS.   A little goes a long way.  I made extras for the Sunday school class that I'm teaching tomorrow.  It's going to be the Easter lesson for the 5yo kids, so I get to teach my son in class tomorrow.  These are quick and easy. I think I did 13 of them in about 20 minutes.

Bananas for Spelling

Every time we start a new spelling list for my second grader (yeah, we do some of that) I try to stretch my brain for new and exciting ways to make our spelling practice more fun.  Hangman is still winner, even after all these months!  But this week when I was cleaning out one of our dressers I came across our game of Bananagrams, and I thought the little letter tiles would be a fun way to practice our words. 

Yes, I was right!  My 7yo loves all things tiny and shiny.  She's something of a hoarder and loves to keep everything tucked away in small places.  She scavenges while we are out and about and is always coming home with funny little odds and ends.  So the jangling banana bag full of glossy, cute, shiny tiles was very enticing! For everyone!  We'll be doing this again, I'm sure.


Thursday, March 28, 2013

Fire Station Field Trip

This was the icing on the cake after finishing up our 5-week unit on Community Workers  for the Kinderboys, which we finished up on the 15th.

I think this is our third family field trip to a fire station in the last 4 years or so, but the kids never get tired of it and I always manage to learn something new!  Today I learned that the big coats they wear don't protect them from the heat as much as I had imagined.  A fireman told us that a very hot outer coat will burn your skin when it comes in contact with your body. And another told us that he received steam burns from the hot air running up the inside of his coat and escaping out his neck area.  OUCH!!!!!

We started out with some classroom time.

 Then headed out to see the trucks!

Then back to the classroom for hats and coloring books!

One of the girls asked, "Who was the first ever fireman?'  They couldn't tell us.  But after looking online, we found some interesting info on Wikipedia:  http://en.wikipedia.org/wiki/History_of_firefightinghttp://en.wikipedia.org/wiki/History_of_firefighting

Wednesday, March 27, 2013

Kaya American Girl Lesson Plan: Book 1 Part A


As previously mentioned, I'm working on documenting the Kaya American Girl History Club that I ran from home several years back.  This won't be as good as it would have when it was fresh in my mind, but I have all my notes, a few pictures and I'm ready to share the lesson plan from our first meeting.  We spent two lessons on each book.  This is Book 1 part A of the Kaya American Girl series. 


Opening: To help the girls get comfortable we played a few games. I explained how the club was organized, the purpose of our meetings, my expecations for the girls, and we got everyone signed up for a turn to do narrations. I then explained our first activity.


Activities:  Our main task for the first meeting was to get to know each other as a group, and then to put together the portfolios that each girl would be using through out the club. I formed these stacking  several manila file folders, hole punching the folded sides and then tying them loosely together with yarn or strips of leather that I got from the craft store.   The portfolios were used to showcase what we were learning about geography and vocabulary from the stories, as well as a place to store and showcase various projects or crafts we had worked on.  Here's one I made as an example.  I made color copies of all the photos we were going to need  for each girl. 

Making the portfolios took some time. The girls got very creative.  In reflection, this probably wasn't the best way to do it. A 3-ring binder with sheets of card stock inside would probably have worked better.


You can see that on our first day our GEOGRAPHY section covered Wallowa Vally, WA, OR, ID, and
original Nez Perce homeland vs. Today’s reservation (back of book resources)
 

Discussion Questions: I usually saved the discussion questions for snack time for two reasons: 1) It saved time to serve snacks while discussing the book and 2) it kept snack time from turning into recess.  In my lesson notes I always referred to this time as "Snack and Talk", which is exactly what we did. It worked well.

Questions for this first meeting: 
  •      Pg 6.  Is boasting a good character trait?  Why? What did Kaya boast about?
  •      Why is it an honor to give gifts?  Is it really better to give than receive?
  •      How do our choices affect others?  Do you think it was fair for all the children to be whipped for Kaya’s mistake?

Nez Perce Life:
I also usually designated a portion of the meeting to discuss Nez Perce lifestyles and traditions.  In this meeting we discussed the following-
How do you like to wake up in the morning?   
What is your routine?   
How do the NP wake up? (morning crier)
Morning rituals: cold water bath in river to stay strong and healthy (all ages all seasons).

Salmon
Salmon were such an integral part of the NP way of life I thought it important to spend some time discussing them.  We did this by reading a book

We also watched a Video about Salmon hatching

Homeschoolshare.com has a lot of great resources for studying Salmon.  I chose to just use the Life Cycle template.The girls colored, cut, assembled the wheel and added it to their portfolios.

And then we played a fun game outside. Basically it was freeze tag.  I made simple pinnies for the two teams that were actually paper plates of different colors and hung around the neck with a length of yarn that was tied to two holes at the edge of the plates.  One team was the salmon eggs hiding under a small parachute.  The other team was the predators standing in various places through out the back yard.  On "GO" the eggs hatched from the parachute and tried to reach their source of food (or base) without being tagged by a predator.  If tagged, the salmon could be unfrozen by another salmon.  

That was all the time we had for the first meeting, although I had LOTS more planned.  I always saved the stuff I didn't have time to do for the next meeting.  This sometimes caused us to get a big off schedule with the reading, but it all worked out in the end.  

Stay tuned to see what we did for Meeting Two.

Friday, March 15, 2013

KinderBoys: Fire Fighters and Treasure Boxes

Today was our last day in our Community Workers unit of KinderBoys.  Since we have a trip to the fire station planned for the end of the month, we focused the first part of our class on firemen.  We started by reading:


The boys each got to dress up in this simple fire fighter outfit and tell me something they remembered or learned about fire and firemen.


Then we quickly switched gears. Ever since our field trip to a local historical museum last Friday, I've been eager to show the boys what was inside the "treasure boxes" that I rented from the museum for $10.  The 4 big blue tubs in the photo above are the treasure boxes.  They were labeled toys, every day living, everyday living, and dress up/resources.  I decided it would be best to save the toy box for last.  So we started with the two everyday living boxes.  We didn't have time to explore everything in the boxes, but we did quite a bit.

The teacher manual that came with the boxes encouraged actual use of the items.  But since I knew I was going to have to pack up immediately after class to return the boxes, I wasn't going to have time to wash and dry the contents of each box.  So I decided we'd do reenactments using the items, and when ever possible, I substituted my own belongings so they could have a more realistic experience.

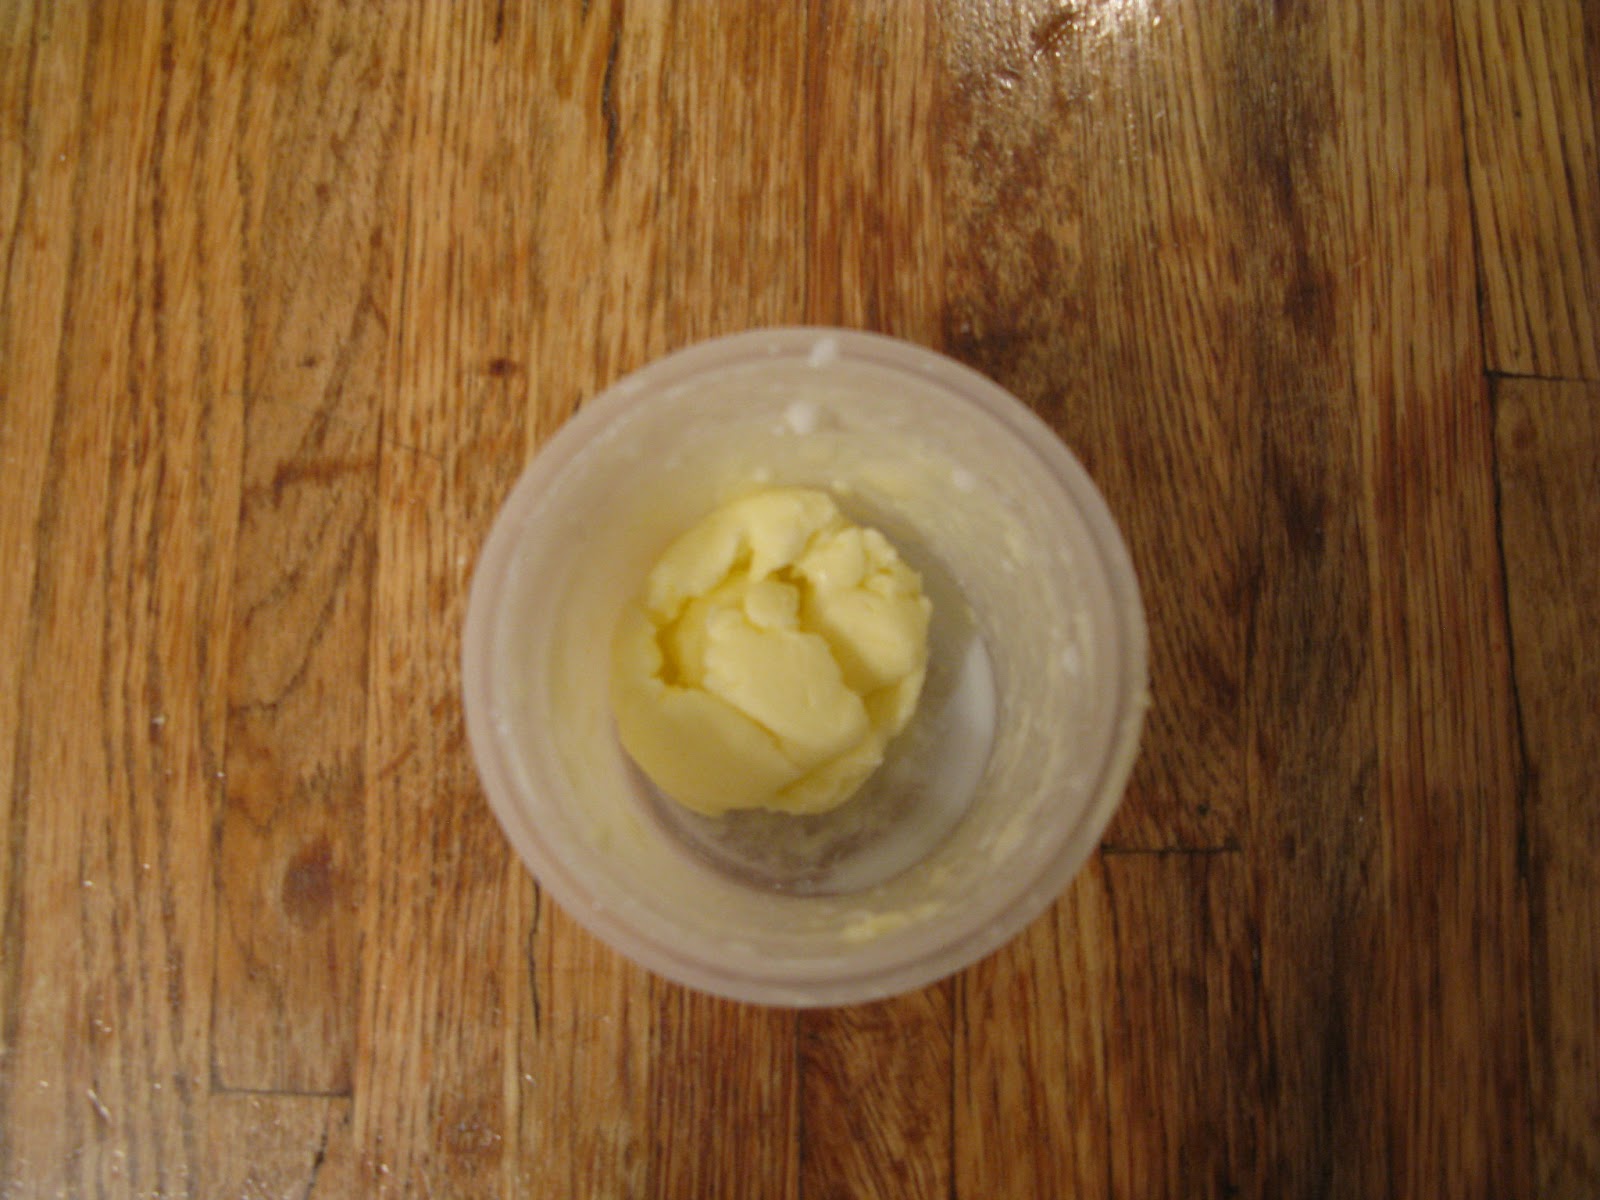
First off, we saw a real butter churn.  I forgot to get a photo!  Instead of using the real butter churn we used a small plastic container  filled with whipping cream and took turns shaking it all during class.  Bythe end of class we had butter!  This is how it looked after pouring off the milk:


Then we got to sift flour. Since I had my own hand-cranked sifter, I let the boys practice using it.  Sometimes I am still surprised by how much young boys enjoy this kind of activity.

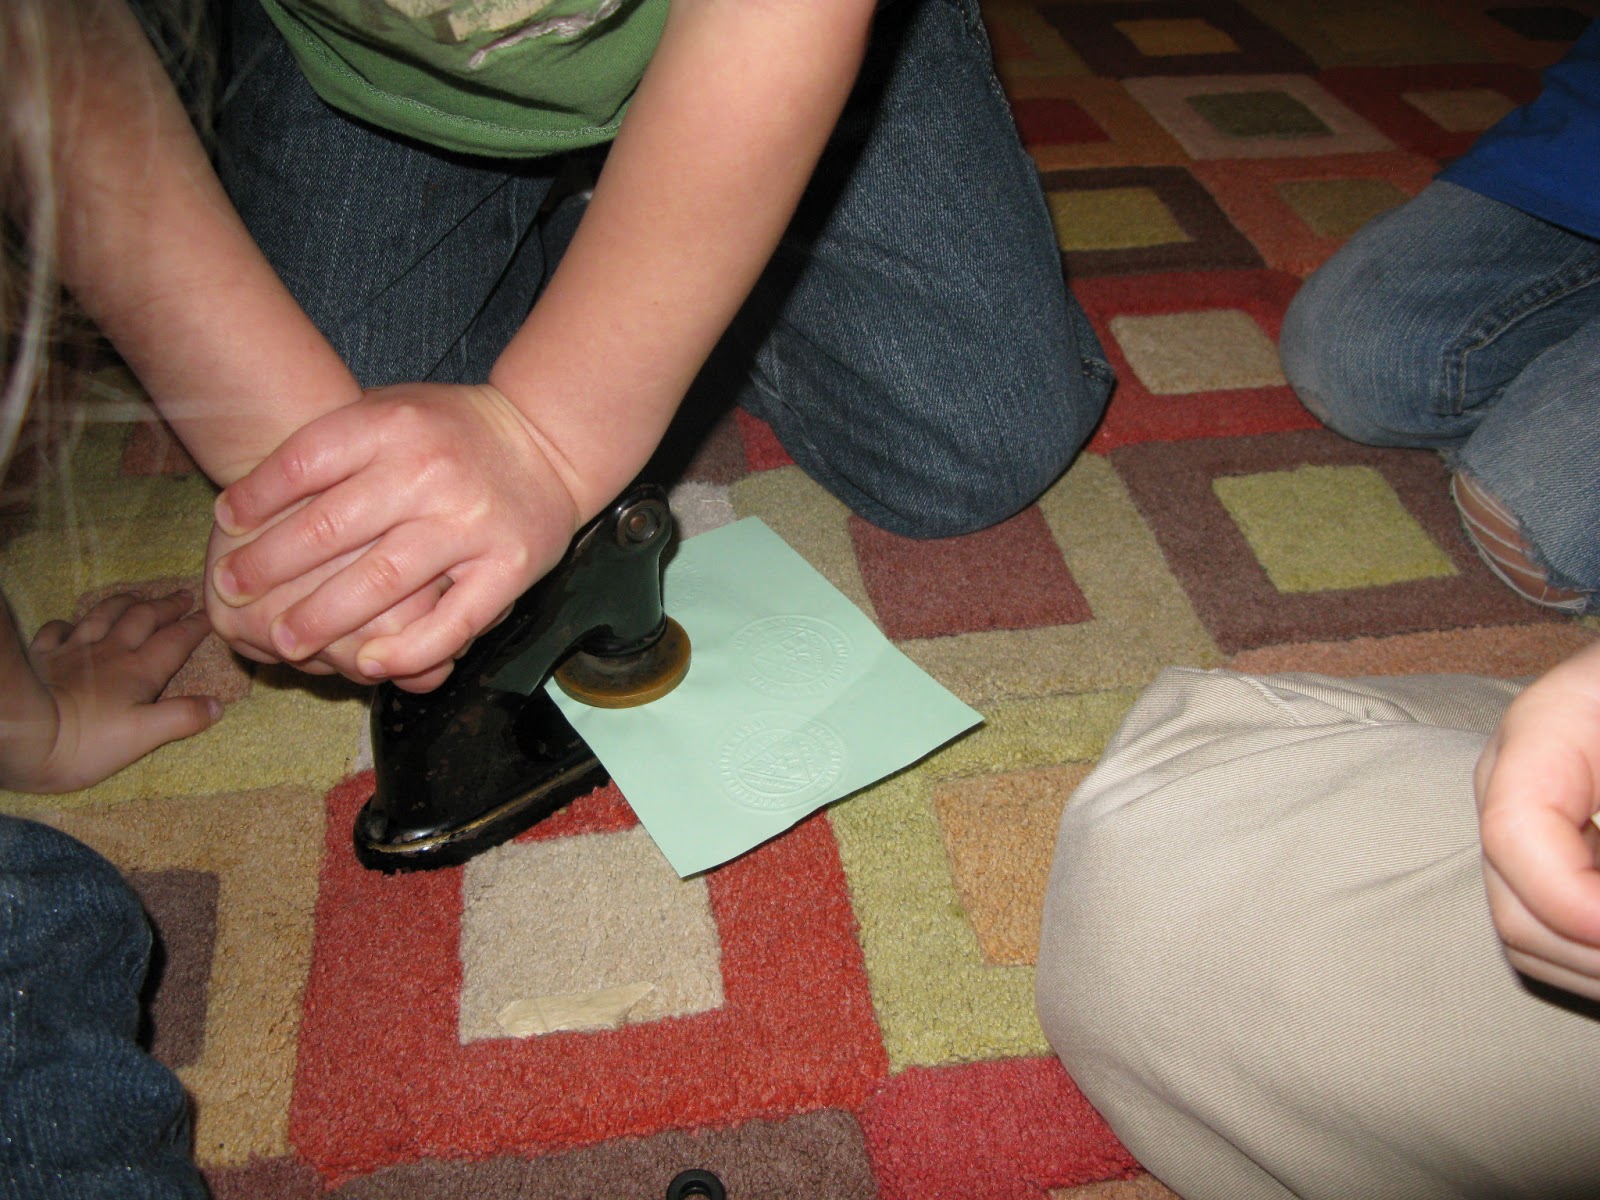
 The boxes also contained a really cool old paper press that leaves a sort of seal on the paper.  Very official looking. I wish I had one to make my letters and envelopes look fancy.
 Ok, so this is where things get a little imaginative.  I let them dry-wash some rags using the basin and wash tub.
 I don't know what this thing is called, but it was also used for agitating dirty laundry in the washtub.
 Then we hung our laundry up to dry with this cool retractable clothesline that came in the boxes.  I want one of those! It was really handy.  You can set up an instant clothesline where ever you happen to be!
 Now, it just so happens that I have my own hand powered laundry agitator that I can use to wash laundry while camping or during a power outage.  So I let the boys use some soap flakes, a bucket of water, and my laundry thing to wash some dirty socks.  For real!  They loved it!
These hand laundry washers are a great item to have in your emergency preparedness stash, or your camping gear.


 Here we are beating a rug.  So glad we have vacuum cleaners these days.
 Getting some practice shaving that baby soft skin!  Don't worry. There's no blade.
 Old-time shaving mug, brush and razor (blade removed).
 Trying on the spectacles.  I actually like this look on him!

Other items they explored but didn't get pictured: old potato ricer, alarm clock, camera, hair curling irons, clothing irons, bed warmer, egg basket, wooden bowls and paddles, butter mold, egg scale, hand cranked cheese graters (think Olive Garden), manual egg beaters, and more.

By the time we got out the toy box it was time to wrap it up with snack and another story.


I read to them while they ate and played with wooden trucks, metal trucks, old penny banks, kaleidoscopes, put-the-wooden-ball-on-a-string-in-the-wooden-cup thingie, wooden propeller thing, cloth dolls, and more.
 We're pretty informal here as you can see....


I love this kind of hands-on history that puts things into perspective for us.  It helps me feel connected to those who came before, grateful for the conveniences of modern day living, and hopeful that we can learn from the past as our young ones continue to forge their way into the future.  I wonder what kind of relics the children 100 years from today will be exploring in their "treasure boxes" of history.  An old Ipod?  A mouse?   A microwave? A printer?  Books?  Plastic? Who knows?


Homemade Petri Dishes Part 2: The Results

Well, I'm no bacteriologist.  But I think I see little globes of nastiness growing on the petri dish that we labeled "mouth".  This was the cotton swab wiped inside my son's mouth and then onto the petri dish. I used a butter knife to scrape off a hunk from the petri dish and put it on a slide with a slide cover, being very careful not to touch it. Truth is, you're not supposed to take the covers off of them after they've grown, but I couldn't get the entire dish to set on the stage of my microscope.  So I stuck my neck out for science, but you better believe I had plenty of antibacterial wipes and hand sanitizer close by.  The kids were NOT doing this part.  I then covered our specimen with plastic slide covers and set the microscope's magnification to 1200x .

Honestly, I don't have the energy to go through ALL of our 12 samples and compare them, so I'm not being very scientific here.  But the goal was achieved: we grew and observed nasty bacteria, right in our own school.  ICKY.  Into the trash they go!  Soap and water for EVERYONE!

I was actually pretty impressed with my little microscope on this experiment.  It's been a great tool to have in our school room.

Wednesday, March 13, 2013

Native American History with Kaya the American Girl - Part 1: Organizing the Club

 So, I'm only four short years late in posting about the unit study course I offered at our home for my then-six-year-old daughter.  But like I've said before, better late than never.  Today I'm tackling this project that has been neglected for four years.  This is the first in a series of posts about the Kaya unit study we did. I'll be outlining why and how this club started in my home, the basics of operating the club and the lesson plans I developed for each meeting.

Why I started the Kaya American Girl History Club
When my oldest was 6 years old and it was our second year of homeschooling, I was still feeling really disconnected, isolated and pretty green.  I had a LOT to learn about homeschooling (I still do).  To help us bond with our local homeschooling communities, I took a huge leap of faith and decided to run a club from home.  I opened it up to anyone who was interested and then waited to see what happened!  I was so pleasantly surprised at the response I got. I advertised (more on that in a minute) 12 openings for the class and they all filled very quickly. I was happy that there were others out there willing to come meet us and be part of our homeschooling experience.

It turned out to be the best thing I could have done for our homeschool. I personally benefited from meeting so many fabulous LOCAL women who were doing their best, like me, to educate their little ones.  Some of the friendships I made in that first group are among the best and strongest I've ever had.  And yes, my kids did find people that they clicked with too so it was a win-win for all of us.

Organizing the club
I used the American Girl Kaya book series as the basis for this club.  At the time, in 2009, I was not able to find any prepared lesson plans to go with Kaya. I believe that most of the other American Girls have teacher guides that you can use to present a unit study.  But Kaya doesn't, or at least I couldn't find one back in 2009.  I decided I would have to read the whole series ahead of time and create my own lesson plans from the readings. So I'm going to share those homemade lesson plans with you in future posts.  But before I do let me just say that I recently did a brief internet search on Kaya and have already found several really good resources that were not available in 2009.  I'll share those with you now so that you don't have to rely solely on what I as able to dream up.
Creek side Learning
American Girl's Learning Guide for Kaya

No doubt there is more, but there's a start to your search.


I used a lot of information from

to help me organize the club. This book introduces what they call "mom schools" and I modeled our Kaya history club after them.

After reading the Kaya books and making rough drafts of lesson plans to go with each book, I drafted an "advertisement" for the class and posted it on several local homeschooling Google and yahoo groups that I belong to. I made sure to include the class schedule and the class syllabus and the cost so everyone knew what to expect before signing up.  I learned the hard way that  offering 12 openings was a mistake.  The group was much too large for my house and my patience ;).  Since then I have limited our clubs to no more than 6 additional kids. Because with my own 4, that still makes a group of ten.

As I received responses to the advertisement for the class, I asked moms to fill out a registration form so that I had everyone's names and contact information. I collected the  $25 materials fee on the first day, or shortly thereafter.  This amount turned out to be not enough to cover my costs and since then I've learned to charge $3/class per child, and that's much closer to covering costs for most things we do.

Schedule, Format and Forms
We met twice a month for a total of six months, which means we had 12 meetings. I started in October and finished in April.  this felt like good timing because we miss the "good" weather on both ends of the school year and we fill the dreary days of winter with something to look forward to.

We covered one book per month (two meetings for each book) and the girls were asked to have read or listened to each book before coming to class.  Each meeting was two hours long.  We set up a schedule for each child to give a narration at the beginning of each class.  This means they told us about their favorite part of the book we were reading at the time.  The narration could be as simple retelling part of  a favorite part or it could be some other representation of the book via art, music, poetry, etc.

I also asked moms to sign up to be my assistant once or twice so that I had a helper for each class. This proved to be my best idea ever!  I really needed extra hands.  And the child who had the narration was also assigned to bring  a snack to share with the group.  This took some pressure off of me since I was usually up VERY late the night before each meeting preparing.  I shared the narration/snack schedule as well as the teacher's assistant schedule with the whole group so that there were no surprises and things were planned out ahead of time.

On the registration form, I also gave the parents several options of related field trips we could take.  I tallied the votes and based our field trips on parent responses to the options I gave them.

Because we were a conglomeration of local families who only knew each other through online support groups, we decided it would be a good idea if we all met together for a play-date before classes started.   We arranged to meet at a park where moms could chat and kids could socialize in a relaxed environment before taking the plunge.  I kinda felt like some moms were sizing up other moms and their kids, deciding if they really wanted to be part of this group or not.  Turns out that everyone enjoyed everyone else very much and it was a fantastic group of moms and kids.   And I was ok with this "sizeing up" thing.  One huge benefit to homeschooling is deciding who you and your kids associate with, so I expect parents to be picky.  And it also turned out that several of the families already knew each other through other activities.  I was really the only total newbie to the group.  :)

So once I had the syllabus, roster, schedules and field trips all planned out we were ready to get started!  I will start sharing lessons plans with you in my next Kaya post.


Monday, March 11, 2013

Homemade Petri Dishes Part 1

On Mondays we do science together.  This is our second year trying to make our way through the Biology II: Worms, Beans, Germs, and Genes! Instructor's Guide (Noeo Science)
curriculum.  It's taking especially long because I keep interspersing it with Battle with the Bugs: An Imaginative Journey Through the Immune System.    Human Body Detectives  has several units actually, and I have mixed them all in at various points where they correspond with Noeo Biology II.
Today's lesson called for petri dishes.  Woops!  I only just read the lesson the night before and I don't normally have petri dishes on hand. So I started searching for a way to make my own.

I found a great site for homemade petri plates 
and I set out to make some! It was actually quite easy and turned out really well.  So glad that I never threw away that box of unflavored gelatin that's been in the cupboard over the fridge for soooooo long.

Here's what you need to get started
The instructions say to use foil muffin liners.  I had none!  So I experimented with several alternatives:
  • normal paper muffin liners (I layered 3 of them)
  • foil wrap pressed into the bottom of the muffin tin
  • short, stiff, wax lined muffin holders.  I can't even remember where or why I got those. But they definitely worked the best!

The recipe made a full 4 cups, and I ended up with plenty left over. If I'd had more muffin tins and liners I would have made another batch.  Oh,I also used the container that held the muffin papers since it came with it's own lid. It also worked well. 
 What ever you use, make sure it's disposable. You don't want to have to deal with exposure to bacteria growth at any point.  You want something that can go straight in the trash.


I put each one inside of a plastic baggie and labeled it "________'s dirty hands" or "_______'s clean hands".  So there were two for each child. I put them on a cookie tray and stored them till morning in the fridge. I noticed that the thin paper muffin liners were sweeating at the bottom, so I put a folded napkin to absorb moisture under those.

The kids discovered this the next morning at when opening the fridge for breakfast.  So we wasted no time getting on with our experiment.  They each put their unwashed fingers in the "dirty" cup.  Some of them even went and touched the toilet first to make sure they were germ-ified.  Then we washed our hands really good, and touched the "clean" cup.  Now we wait!  We had a couple left over, so we swabbed the insides of our cheeks with q-tips and wiped them on the petri plates, just to see what happens.  We also placed a piece of pepperoni on another petri.  I wonder if/what it will grow?

We'll keep you posted!

Sunday, March 10, 2013

Chores for Tweens - No Charts Please

It's Sunday.  And I love Sundays.  This is my day of rest.  A day to take a break from  my life.  :)  But I've had these thoughts swirling in my head for a while and just feel the need to think them out loud here.  It's about chores. Specifically, chores for tweens. I have a ten year old in the house, and I confess that it already feels like she's 13. Yikes.

Every family has to find a chore system that works for them.  And for us, it's taken years to really figure it out.  After trying every routine, chart, reward system, and program you can think of here's what I RE-learned about myself: Charts and sytems don't work for me because they end up just being more work. Sometimes they were even the source of contention in our home, which was completely contrary to my ultimate goal.

While I realize that charts don't work for me personally, I do realize that they can be effective for kids trying to build healthy and helpful habits. But seriously, if the chart is a "chore" for me, it's just not going to help anyone at all because I won't enforce it.  This situation has given me quite a bit of pause.  I've had to really think about this because sometimes a whole day will go by before I realize that my kids have done pretty much anything they wanted all day (mostly) without being helpful.

There's a hymn we sing at church that starts like this:

 Have I done any good in the world today?  
Have I helped anyone in need?  
Have I cheered up the sad, 
and made someone feel glad?  
If not I have failed indeed.
...
Doing good is a pleasure,
a joy beyond measure,
a blessing of duty and love.

 One day that hymn was running through my head and then it hit me!  We don't need to be checking off boxes or filling out charts to know we're helping and useful.   Sometimes our "chore" for the day is comforting someone in need.  Maybe that someone is a sister or a brother.  Maybe that someone is an over-tired mom that could use a hand reading bed time stories to the younger kids.  Maybe that someone is a neighbor child that is lonely and could really use some happy company.

So I changed my tune. Instead of asking, "Is your room clean?  Did you pick up your towel?  Is the table wiped off?  Did you sweep the floor?"  I'm trying to ask these questions, "What have you done to be helpful today?  What could you do right now to help out?  Do you see something that needs to be done?"

I think this has really helped, especially my tween.  I see her pause and really think about our current situation.  I see her scanning, evaluating and considering.  Sometimes she has a whole list of things she can think of that she's done to be helpful. And to be fair, many of these things go unseen by me, but definitely have a positive influence on our home.  Other times, she has to fess up and say, "Um, nothing."  And that's when I can direct her attention to a need she could fill, whether it be fetching an item, taking over a baking project, dressing a sibling, saying a kind word, or an actual "chore" for the day.  And I've learned to just say out loud to the kids, "I need help!  It's too busy and I can't do it all.  Help me please!"  And they seem to rise to the call with willing hearts.  I much prefer this kind of helpfulness, than the kind that is motivated by stickers and M&Ms.

I've also noticed that sometimes asking two children to work on a task together makes it seem more manageable for them and less overwhelming.  I can't tell you the satisfaction I get when I see my 5yo and 7yo spontaneously sorting laundry together, or cleaning up the Lincoln Logs, or making the 2yos bed as a special surprise for her.  For weeks my 5yo would wait for me to leave my room in the morning so he could secretly make up my bed.  His small arms and legs struggled with this task, and the end result was far from perfect.  But his desire to serve is so plain, and the joy we both feel at admiring his efforts is so much more rewarding than checking off a box.

Don't let me lead you into believing that my kids are angels all of a sudden and that our house is always clean.  Ha!  We have miles to travel yet down this road.  But we're on the right path, I think.  Finally.

This whole concept goes along very well with the Frontier Girls motto: See a Need, Take the Lead.  Our church leaders also teach us to "first observe, then serve".  These are skills and attributes that I really want my kids to have as they develop into caring, productive beings. I believe that great leaders are servants to all, just as Christ was.  Learning to serve at home is crucial to developing leadership outside the home. And there's no chart in the world that can teach it.  But with the right attitude, I can! 

Saturday, March 9, 2013

Giddy UP!

My oldest daughter has been in love with horses for the last 7 years.  Trust my girl to pick one of the most expensive hobbies around!  Unfortunately, we can rarely indulge her interests. For a year we volunteered at a rescue animal barn twice a month. That was fabulous!  We got to learn about and work with horses very closely. And it was entirely free!  Sadly, the barn's finances were a mess and they had to close down.  But if you have a child that is horse crazy, and a budget that is NOT, do look around for some volunteer opportunities in your area.  Rescue barns have low budgets and high needs for volunteers.  See what you can do!

Anyway on birthdays, I try to find some kind of Groupon or local discount on a riding lesson for my little cowgirl. Such was our luck this month!  I found a 50% off coupon at a local barn for an introductory lesson.   then they gave us another half off lesson if we "liked' them on Facebook.  You can see their site here http://www.equinelifesolutions.com/ 

I took two of the other kids along, who also have an interest in horses.  They didn't get to ride today, so I kept them busy taking pictures.  So let me introduce you to this post's photographers

 I think their work (below) speaks for itself!


Of course, I knew I was digging myself into a trap here.  I knew she'd come out glowing and begging for more lessons. And...I was right.  But at least for today she got to do something she loves.